Risks with orthodontic work you should know

Orthodontic treatment isn’t particularly risky, but as with any intervention to your body, it does carry some minor risks.

Whether you’re looking into orthodontic treatment for your child, or you’re considering treatment options as an adult, it’s important to have the information to be able to weigh up the risks and benefits of treatment before making a decision.

Image result for Risks with orthodontic

Toothache and mild discomfort

When you first start treatment, you may feel some mild discomfort as your mouth gets used to the orthodontic equipment and your teeth begin to move. This discomfort will vary from person to person, and will depend on your own pain threshold and the treatment you have chosen.

If you feel any discomfort due to the pressure on your teeth, we recommend taking over-the-counter pain relief.

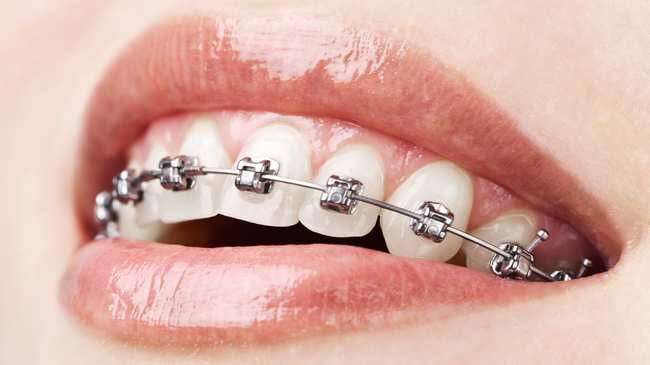
Scratches and ulcers

At the start of your orthodontic treatment, it’s fairly common to feel some small scratches and ulcers on the inside of your mouth, especially if you’re wearing a fitted device such as braces. This will usually only happen for a couple of days, until your mouth gets used to the shape of your braces.

However this can be easily solved using orthodontic wax, which is an easy and immediate way to protect your mouth during this initial phase.

Gum infection

Maintaining good oral hygiene is important for everyone, but it’s especially important if you’re undergoing any type of orthodontic treatment. Poor oral hygiene can lead to gingivitis and gum infection which can slow down the movement of your teeth – if you’re wearing an orthodontic appliance then this can mean treatment takes longer. In some cases, the infection can cause irreversible damage to the tissues which support your teeth.

Make sure you maintain a healthy oral hygiene routine and follow the guidance of your orthodontist to prevent gum infections. Regular professional cleans with your dentist will also help.


Enamel demineralisation

Enamel demineralisation, where the enamel wears away on the tooth, can occur during orthodontic treatment, particularly with fixed appliances such as braces. It is primarily caused by sugar, which starts a decay process in the enamel. If left to progress, over time this demineralisation can lead to cavities and tooth decay, which appears as white or yellow stains on the teeth.


Root shortening

For some patients, the length of the roots of their teeth become shorter during treatment. It’s nearly impossible to predict whether or not it will happen to you – but some people are more prone to it than others. In general, root shortening doesn’t have significant consequences, but on very rare occasions it may threaten the longevity of the tooth.

Tooth vitality

As orthodontic treatment moves the teeth, some pre-existing conditions (such as trauma or decay) might be aggravated by wearing an orthodontic appliance. The movement the tooth undergoes during treatment might further aggravate the tooth. While very rare, this can lead to the tooth becoming discoloured or requiring root canal treatment.

The Development of Root Canal Treatment

Root canal treatment by root canal treatment equipment is the process of going inside the pulp space and removing the infected, dead tissue. The procedure involves removing the damaged area of the tooth (the pulp), cleaning and disinfecting it and then filling and sealing it. The common causes affecting the pulp are a cracked tooth, a deep cavity, repeated dental treatment to the tooth or trauma.  The space is then disinfected and sealed with special materials.

Generally speaking, whatever the cause of root canal or pulpal disease, root canal or endodontic treatment will be necessary to save the tooth. All dentists receive training in endodontic treatment and can perform root canal procedures, but often a general dentist will refer individuals who need endodontic treatment to an endodontist, a root canal specialist.

Endodontists are dentists who have completed an additional two or more years of advanced residency training in the diagnosis and management of diseases and disorders of the dental pulp tester, and in the diagnosis of dental pain; their focus is therefore on saving teeth. In order to make a proper assessment and accurate diagnosis of which tooth is affected and exactly what is causing the pain, a thorough history and examination is necessary, together with a radiographic picture (x-ray) of the tooth or area.

Your dentist or endodontist will check your medical history and current medications to ensure your health and treatment safety. If you are very nervous, an oral sedative or anti-anxiety medication may be helpful — discuss the options with your dentist or endodontist ahead of time.

Preliminary treatment to remove the decay and the source of infection of the pulp is necessary, along with a determination of whether the lost tooth structure can be restored. If a fracture of the tooth has reached the pulp, or infection is associated with gum disease, it could be more difficult, if not impossible, to save the tooth.

Nowadays, root canal treatments are performed with advanced techniques and materials, making them far more comfortable and faster. After root canal treatment is complete, your restorative dentist will usually place a crown on your tooth to safeguard against fracture.


What’s the Basis for Successful Endodontic Treatment

Root canal shaping is one of the most important steps in canal treatment. It is essential to determine the efficacy of all subsequent procedures, including chemical disinfection and root canal obturation are the basis for successful endodontic endo motor treatment, aiming to debride the root canal, to remove contaminated dentin, and to create an ideal canal shape for three-dimensional filling .

The main objective of a clinician is to mechanically and chemically cleanse the root canal system thoroughly, making it free of microorganisms and their substrates.

The root with a graceful tapering canal and a single apical foramen has long been established as an exception rather than the rule. Bifurcating canals, multiple foramina, fins, deltas, loops, cul-de-sacs, intercanal links, C-shaped canals, and accessory canals have most commonly been faced by the investigators in most teeth .

The instrumentation of the apical matrix to a large size leads to more anatomical irregularities and increases irrigant exchange in the apical third. Apical enlargement during canal cleaning and shaping procedures increases the likelihood of achieving maximum elimination of bacteria from root canal system , though a major part of the canal remains uncleaned even after thorough cleaning and shaping .

Until recently, most investigations have involved counting the number of canals and foramina and categorizing how the canals join or split. Majority of studies have tried to evaluate the shape of the canal systems( root canal treatment equipment ) and its clinical implications than to evaluate the actual preoperative size of the canal .

However, it is recommended not to widen the root canal to a larger extent to avoid unnecessary weakening of the root and increased risk of fracture. Regarding modern concepts, the final canal allows adequate irrigation and close adaptation of the filling material during obturation . Working width (WW) is relatively new concept, which involves perceiving a root canal in both perpendicular (working length) and horizontal (WW) dimensions. Thus, endodontic ―working width‖ has always remained unforgotten dimension during root canal procedure without solid scientific evidence; however, it is still not clear ―how large is enough.

How Root Canal Treatment Exactly Carried Out

The procedure of root canal treatment involves removing the internal parts of the tooth chamber and then filling the empty cavity with a suitable compatible material. It is a painless procedure that is usually completed within 4 sittings but may extend to 7-8 depending on the doctor and the extent of damage. We will describe the root canal treatment and how it is exactly carried out by root canal treatment equipment in detail.

The dentist first diagnoses the patient and advices him to go for treatment in case his root canal has gotten destroyed. The tooth area is then separated from the other regions with the help of a rubber dam kit. This ensures that the probability of mixing of fluids from the motor and saliva doesn’t take place. Thereafter the dentist would drill in a cavity in the tooth with the help of an aerator and thereafter root canal files are used to entirely clean the root. These files also help in removing the pulp of the tooth.

Subsequently the dentist will temporarily fill the cavity with a filling material and also place in a soothing medicine so as to prevent any kind of infection.

Over a period of sittings, the dentist observes if the root canal’s health has improved and once convinced the temporary fillings are removed and the pulp chamber and the root canal is permanently filled. A tapered, rubbery material called as gutta percha is inserted into each of the canals and more often than not the procedure is completed with the opening being sealed with cement. The last stage involves crowning the tooth so as to restore its natural shape and appearance. The crown will help to restore the tooth’s strength and protect it from cracking. The crown needs to be placed soon after having root canal treatment.

Nonliving (non-vitaltherapy) tooth:With this treatment method dentist will provide general sedation to numb the unpleasant teeth.In non-vital pulp therapy, your pulp is removed through the top of the teeth and also from the root. Dentist will probably clean up the canal and also seal using long-lasting barrier materials just like a rubber kind material or dental lab equipment  known as ‘gutta percha’. Then a stainless-steel cover is placed over the teeth.

What’s the fix for failed root canal treatment?

a) Retreatment
Root canal treatment with root canal treatment equipment cases that have failed can be retreated. In most cases this involves repeating essentially the same procedure that was performed originally, with the exception that time must be committed to removing the previously placed sealing materials. We now discuss this topic here: Root canal retreatment.
Your dentist may offer to perform this work, or they may feel that the expertise of an endodontist is required.

b) Tooth extraction and replacement.
Besides retreatment, the only other option for a tooth with failed root canal is extraction and replacement. This option might be chosen because retreatment is impossible, it only offers a low success probability or its cost-effectiveness is questionable.

c) Timing your treatment.
Whatever type of follow-up treatment is chosen should be performed within the time guidelines recommended by your dentist. After performing an examination, they can gauge how much urgency appears to be involved.

Teeth with failed treatment can be unpredictable due to the fact that they frequently harbor infection, which has the potential to flare up (create pain and/or swelling) without warning. As a precaution, you dentist might write you a prescription for antibiotics, so you have them on hand if conditions with your tooth turn to the worse before treatment can be performed.

Related dental goods:best dental apex locator     endodontic endo motor

The steps of the root canal procedure

Step 1 – Placing the rubber dam
After numbing you up, your dentist with dental apex locator and dental electric pulp tester will “isolate” your tooth by way of placing a rubber dam.
A “rubber” dam is really a thin sheet of latex (usually about 6 x 6 inches).
Your dentist will punch a tiny hole near its center.
They’ll then stretch the sheet over your tooth so it alone sticks through the punched hole.
A metal clamp is then positioned to hold the dam in place.
As explained in our slideshow, the portion of the tooth that sticks through the dam lies in a region where its environment can be controlled. The tooth can be washed, dried and kept saliva-free.

Why is tooth isolation important?

One of the fundamental goals of root canal therapy is removing contaminates from within the tooth.
Since saliva contains bacteria and other debris, a rubber dam acts as a barrier that helps to keep the tooth isolated (clean, dry, contaminate-free) during its procedure.
Note: Placing a dam is a part of the general “standard of care” that any and every dentist must responsibly provide. If your treatment doesn’t involve using one, you should be asking questions.

Step 2 – Creating the access cavity.

As a starting point for performing your tooth’s treatment, your dentist will need to gain access to its nerve space. This step is called creating an “access cavity.”
An access cavity in the chewing surface of a molar.
The hole through which the dentist performs their work.
View Slideshow
Your dentist will use their dental drill to make a hole that extends through the surface of your tooth to its pulp chamber.
This is the opening through which they will perform their work.
With back teeth, the access cavity is made right through the tooth’s chewing surface (as shown in our picture).
With front ones, it’s made on their backside.
When creating the access cavity, the dentist will also remove all tooth decay, and any loose or fragile portions of the tooth or its filling.

Step 3 – Measuring the length of the tooth.

Your dentist’s goal will be to treat the entire length of your tooth’s nerve space but not beyond.
To be able to work within these confines, your dentist must measure the length of each of your tooth’s root canals. This measurement is typically calculated to the nearest 1/2 millimeter (about 1/50th of an inch).

Step 4 – Cleaning and shaping the tooth’s root canals.

he next step of the root canal process involves “cleaning and shaping” the interior of the tooth (the tooth’s pulp chamber and each of its root canal treatment equipment.

In regard to this step:
Its cleaning aspect removes nerve tissue (live and/or dead), as well as bacteria, toxins and other debris harbored inside the tooth. (Here’s more detailed information about why this is needed.)
Shaping refers to a process where the configuration of a tooth’s canals are enlarged and flared, so they have a shape that’s ideal for the procedure’s filling and sealing step.
The whole process is a balancing act. One where the dentist seeks to accomplish the goals above without removing so much internal tooth structure that the integrity of the tooth is compromised.

Step 5 – Sealing the tooth.

Once the interior of the tooth has been thoroughly cleansed and properly shaped, it’s ready to be sealed (have its hollow interior filled in).

In some cases, the dentist will want to place the filling material immediately after they’ve finished cleaning the tooth.
With other cases, they may feel that it is best to wait about a week before performing this step.